Javascript is not enabled.

Javascript must be enabled to use this site. Please enable Javascript in your browser and try again.

Skip to content
Content starts here
CLOSE ×
Search
Leaving AARP.org Website

You are now leaving AARP.org and going to a website that is not operated by AARP. A different privacy policy and terms of service will apply.

AARP Smart Guide to Spring Cleaning

76 tips, tricks and shortcuts to efficiently tidy up — plus how to make maintenance easier throughout the year


spinner image hand holding a spray bottle that appears to be spraying out flowers; blue background
Getty Images

A comprehensive spring house cleaning can feel a bit overwhelming, but focusing on one room at a time can help spread the workload over a few weeks. This room-by-room guide offers tips and tricks for efficient cleaning, plus details on how often you really need to clean specific items. We also share recommended cleaning agents (including many that are DIY and natural) and note ways to swap out toxic substances. And we provide advice on modern-day conveniences, like HEPA filters and electronics, so that you can keep these investments in tip-top shape.


SAFETY FIRST

1. Don’t mix chemicals

Resist the urge to combine multiple cleaning products, as it could create toxic fumes or chemical burns. Never mix bleach and vinegar, bleach and ammonia, hydrogen peroxide and vinegar, drain cleaner and bleach, bleach and rubbing alcohol, or toilet bowl cleaner and bleach. And while combining baking soda and vinegar isn’t toxic, it actually decreases the effectiveness of each component. 


spinner image hand washing window with squeegee; soap on window
Getty Images

START OUTSIDE

2. Get squeaky-clean windows

Use a vacuum attachment to remove dust and debris from sills and tracks. Then clean with equal parts warm water and vinegar (plus a dash of dish soap if they are really dirty). “Use a squeegee, microfiber cloth or sponge to clean the windows,” says Val Oliveira, CEO of Val’s Services Cleaning in the Chicagoland area. Remove excess water with a squeegee or paper towels. If your windows are out of reach, use a window cleaning pole kit (typically under $50) or consider hiring someone to do the job for you. Remove screens and use a scrub brush with soap and water to clean, then rinse in the sink, tub or outside. Let them dry completely before putting them back in the windows.

3. Clean outdoor light fixtures

Over time, porch and walkway lighting fixtures can accumulate dirt, leaves and bugs. Kathy Cohoon, operations manager at the professional home cleaning service Two Maids, in Pensacola, Florida, says it's important to first ensure the power is turned off before cleaning anything electrical. Next, remove any debris, and then wipe the glass with a damp cloth using a mixture of dish soap and water. If you’ve noticed the bulbs have dimmed over time, consider replacing them for maximum brightness.

4. Clean exterior mats

If your exterior mats are in good shape, a good cleaning will get them looking almost brand new. Coir (all-natural fiber made from coconut husk) mats can be vacuumed and rubber mats can be scrubbed clean. Make sure they’ll stay put and throw away old or worn exterior rugs or mats, and replace them with sturdy ones with a good backing so they don’t move and you can prevent falls. To make coir outdoor rugs and mats fade-resistant, spray with a can of clear polyurethane, which you can purchase online or at hardware and big-box stores. This will create a seal to protect them from weather and wear and tear. Wait for the mat or rug to dry fully before walking on it.

5. Clean outdoor rugs

Always check tags first for washing instructions. Typically, small rugs can be cleaned in the washing machine, says Cincinnati-based Jill Koch, owner of Jill Comes Clean. “If they are too large for the wash, hose them off. You can drizzle some soap on top — just a little — then scrub with a large scrub brush, hose off and let them sit out to dry.” Use a large squeegee to push off excess water.

6. Wash your front door, threshold and door frame

Your front door is the first thing that you and your guests see when arriving at your home, and yet it is often completely overlooked when cleaning, says Logan Taylor, founder of Dazzle Cleaning Company, in Seattle. Fill a bucket with half a gallon of warm water and two tablespoons of dish soap. With a cleaning cloth, wash both sides of your door, the door frame, the threshold, and any ledges that may be above the door.

7. Wipe down outdoor furniture

Use a soft brush or nonabrasive cloth to remove dirt, cobwebs and debris. For metal or wood furniture, use hot soapy water followed by a rinse, suggests Koch. For fabric and pillows, check the tag for recommended instructions: It will say W, S, WS, WASH or X. W stands for Wet, and means you can clean with a water-based cleaner or fabric steam cleaner. An S stands for solvent and means it is dry-clean only. WS stands for Wet and Solvent, meaning either use a water-based cleaner or dry-clean — it’s best to figure out what the stains are and choose your cleaner based on that. WASH typically means you can wash the item in the washer with cold water on a delicate cycle, then air-dry or tumble low. And X means vacuum only.

8. Power/pressure wash concrete and decks

Pressure washing is a great way to quickly remove dirt and debris, but without proper training, you can damage loose brick and older wood. There’s also a risk of injury, as the pressure can kick up pebbles and dirt, so you’ll need the proper protective gear, too. It may be wise to hire a professional to handle this job. As for the concrete around your property (like a sidewalk or driveway), use a power washer with a psi of 3,000 or more. You can buy or rent one: They typically run at least a few hundred dollars to purchase or to rent for multiple days. Make short passes with the wand, and start on the highest ground and work your way down, so you aren’t pushing dirty water onto a freshly washed surface. Once the surface is clean and dry, add abrasive strips, like cost-effective grit treads and tape, to help improve traction in wet conditions. For a permanent and safer solution, consider installing nonslip stair treads. Alternatively, look for nonslip deck paint, which features more texture for extra traction.

9. Inspect the roof and gutters

If you’re nimble enough and your roof’s pitch isn’t drastic, you can remove debris in your gutters, drains and downspouts by hand or with a leaf blower, then flush with a garden hose to remove smaller debris. Consider installing a hooded system that stops debris from accumulating. Check on the state of your roof while you’re up there — if any shingles look broken or cracked or are missing, contact a few roofing contractors to get estimates. If this task is too dangerous for you, hire someone to do it for you.  

10. Check your solar panels

If you have solar panels, unplug them and check the manufacturer’s recommendations for cleaning them. Typically, they can be cleaned just as you’d clean glass — using water with a little dish soap, along with a soft sponge or cloth. Be sure to also inspect them to ensure they are free from damage, cracks and animal nests.

11. Clean your grill the right way

Stop using the metal bristle brush on your grill. Those nearly invisible small metal pieces can break off and make their way into your food and body, causing harm. Instead, use a coil brush or crumpled aluminum foil.


spinner image garage with cabinet, baskets, coolers, crate, basketballs, golf clubs, tennis rackets and bicycles
Stocksy

GARAGE

12. Declutter first

Start by emptying all the garage contents into the driveway or yard so you have a clean slate to work with. Sweep out leaves and debris, and wipe down cabinets or shelving. Make three piles: “donation,” “trash” and “keep.” Purchase organizational solutions to keep things tidy. Reorganize your items as you place them back in the garage, so that similar items are grouped together and the things you use most are the most easily accessible.

13. Dispose of old paint and chemicals

Household hazardous waste — such as paint, batteries, and lawn and automotive chemicals — can’t be placed in trash or recycling containers for safety reasons. Check with your local environmental, health or waste agency for drop-off locations or special pickup days for these items. Your local auto parts, home improvement or battery stores may also accept and properly dispose of these items.

14. Clean the garage floor

Due to gaps under garage doors and openings around windows, Cohoon says, garages can be an entry point for mice, so it’s important to clean the floor on a regular basis. Sweep away loose debris and then use a pressure washer to remove oil stains and grime.

15. Declutter and clean your vehicles

Your car’s interior can also become cluttered and dirty, so Cheryl Nelson, founder and owner of PrepareWithCher.com, which offers preparedness and national disaster advice, says to start by decluttering your glove box, storage compartments and the areas under your seats and your trunk. Dust the inside of your vehicle, including the dashboard, with a microfiber duster. Use a small handheld vacuum on the floors, mats, seats and small crevices. Clean the inside and outside of your windshield with glass cleaner. While you're at it, she says to make sure your vehicle has an emergency kit and first aid kit.

16. Clean and organize tool cabinets

It’s easy for tool cabinets to become disorganized and accumulate dirt. It’s likely that you’ll be using these tools more often in the warmer months, says Cohoon, so give yourself a nice reset by emptying the cabinets and wiping down these surfaces with a damp cloth. Once clean, try grouping tools by type and utilizing drawer organizers to prevent tools from getting misplaced.


spinner image person wearing yellow gloves cleaning stovetop
Getty Images

KITCHEN

17. Brighten up your pots and pans

Clean any scorched pots and pans with products made for stainless steel, aluminum and ceramic. Oliveira recommends The Pink Stuff and says to let the cleaner sit on the pot for a bit, then scrub with a sponge before rinsing. You can also try Bon Ami or Bar Keeper’s Friend, making a paste with water and letting it sit in the sink.

18. Disinfect the sink

While you should clean your sink after each meal prep, it’s important to disinfect the bottom and sides once or twice a week to prevent bacteria growth. According to the National Science Foundation, the kitchen sink is the second-germiest spot in your kitchen (first place goes to your sponge). The organization recommends using 1 tablespoon of bleach mixed into 1 gallon of water. If you have a garbage disposal, run it with hot water and add lemon slices to help clean the cavity and give off a fresh, citrusy aroma. Disinfect your sponge by soaking it in full-strength vinegar for five minutes or placing it in the top rack of your next dishwasher load.

19. Clean wooden spoons

Wooden spoons are great because they don’t scratch cookware or heat up too quickly — but they’re porous. “Wood easily sucks everything into it,” says professional cleaner Auri Kananen, which is why you should never use them for raw meat. Koch says to soak wooden spoons in equal parts vinegar and hot water for 20 minutes, or scrub with a paste of baking soda and lemon. “Then wash by hand, dry and apply some food-grade mineral oil if they seem dry,” says Koch. “To sanitize, wipe them with hydrogen peroxide after cleaning and let sit for 10 minutes, then wash again in soapy water and dry.”

20. Deep clean the fridge

Remove everything from your fridge, including the shelves, which Kananen says can be washed in the dishwasher. Then spray kitchen cleaner into the fridge, scrub with a sponge and rinse with a damp microfiber cloth. “If the fridge smells, you can wipe the fridge with vinegar,” she says. “If you have dried-up stains, use a scraper.” Pull your fridge out from the wall. and clean behind and around it, too.

21. Polish stainless steel

Wipe appliances down with soapy water, then dry them. “For stainless, wipe with the grain, and after cleaning use a little baby oil on the microfiber cloth to get rid of streaks,” says Koch. “Buff it in and use the dry side of the cloth to remove any excess.”

22. Clean the oven

Remove the grates, then spray oven cleaner inside and cover with plastic wrap. (Open your windows and wear long gloves, safety goggles and a face mask or respirator to help protect yourself from exposure.) “Let it sit for an hour or more,” Kananen says. Then remove the plastic wrap and scrub with a scraper, steel wool or a Scour Daddy Steel. Wipe everything with a damp microfiber cloth. Use the same process for the racks. For a less toxic option, mix a 3:1 ratio of baking soda and warm water into a paste, add a few drops of citrus-based essential oil for its degreasing properties, and coat the oven with this paste. Let it sit for 10 to 12 hours (overnight works well) before wiping clean, then spray some vinegar prior to a final wipe down.

23. Reorganize junk drawers

Remove everything from the drawer, evaluate, discard items and move what does not belong to other places in the house, says organization expert Jane Stoller, author of Decluttering for Dummies. “Add back in only the essentials you use. This could include rubber bands, matchboxes, labels, scissors and tape. Use trays to keep them organized.”

24. Organize and purge storage containers

After removing all plastic storage containers from their designated cupboard, Taylor says to wipe out the cupboard with a clean cloth and all-purpose spray. Use the hose on your vacuum to suck crumbs. Next, match all of the containers to their lids. “If they don't have lids, it's time to let them go,” he says. Arrange by size and shape and put them back in their home.

25. Swap out water filters

Your refrigerator’s water filter needs to be replaced at least every six months — sooner if your water tastes funny or your ice smells or tastes off. If you have hard water, you may need to change it more frequently, as that hard water can clog your dispenser with mineral deposits. Always reset the indicator light, so it’ll alert you when it’s time to change the water filter again.

26. Wipe walls and baseboards

Dust off walls and baseboards first, then start with a fresh mop that has a different head than the one you use to clean your floors. Oliveira says to dip the mop into a bucket of hot water and soap, and remove excess water until it’s damp, not sopping. Then sweep the mop up and down your walls. Next, dust baseboards with a vacuum extension, then use the same mop from the walls to wash away any dirt. Wipe a new fabric softener sheet along your baseboard to help stave off dust.

27. Clean the microwave

Place a glass cup of water into the microwave and let it boil (one to three minutes on high, depending on how powerful your microwave is). “Let it sit for a few minutes so the steam softens the stains,” says Kananen. “If you have stains left, spray some kitchen cleaner and use a dish brush. It is great for reaching all the crevices and corners. Wipe with a damp cloth.” Leave the microwave door open until it’s dry.

28. Scrub your trash can

Empty your trash can and “use a scrub wand along with soap and vinegar to effectively clean” it, says Oliveira. After scrubbing, wipe down the trash can with a paper towel or clean rag to remove any remaining residue. For particularly stubborn stains or odors, she suggests applying a mixture of baking soda and water to the inside of the trash can and letting it soak for several hours before rinsing clean.

29. Clean the dishwasher

There’s a filter in the bottom of most dishwashers that needs to be cleaned once a year to once a week. Your machine will run more efficiently the more often you clean, so remove that along with the utensil holders and racks. “Next, fill a dishwasher-safe bowl with 1 cup vinegar and place it on the bottom rack of the empty dishwasher,” says Oliveira. Run a hot water cycle, which allows the vinegar to break down any grease, residue and soap scum. Then use a sponge to wipe any remaining stains or buildup. Run water over the filter to dislodge grime before replacing the filter, and use a soft brush for any stubborn areas.

30. Sanitize countertops

Dip a sponge into a soapy solution and scrub every square inch, Oliveira says. Then, follow up with a sanitizing solution that’s safe for your countertop material (for instance, she says it's best to avoid using vinegar on marble or granite), such as a mixture of water and vinegar, isopropyl alcohol, or disinfecting spray. Use a clean, microfiber towel to wipe dry. Don’t forget to seal your marble and granite countertops: follow guidance given by the installers.

31. Wipe down the stovetop, and clean burners and vents

If you have burners, put them in a large bowl with hot water and soap to soak and release all the grease, says Oliveira. “Spray degreaser onto the stovetop, and use a sponge to scrub it right to left.” For a chemical-free option, make a natural degreaser by pouring 1 cup distilled white vinegar, 1 cup hot water and ½ teaspoon dishwashing liquid into a spray bottle. If the burners are very dirty, use The Pink Stuff, Bon Ami or Bar Keeper’s Friend to clean them. Or sprinkle baking soda on the stovetop, spray vinegar on top of it, and let it sit for a few minutes before scrubbing with a sponge. Rinse the burners with water, and dry them with a microfiber cloth. For vents, remove them and scrub with soap and water. If they’re extra greasy, use something stronger, like Oxiclean, Superclean or a soap degreaser.

32. Mop the floor and wash rugs

When it comes to washing different types of floors — such as linoleum, luxury vinyl planking, tile or wood — Oliviera says it's important to consider the material’s specific requirements and adjust your cleaning method and solution so that you clean effectively without causing any damage. For instance, wood floors should be swept and damp mopped more often, using cleaners specially made for wood. Never use soap-based detergents on laminate floors. Vinyl floors are best cleaned with a damp mop and mild detergent, and water should be used sparingly on linoleum. But no matter which method you need to follow, repeating the process once or twice will ensure a deep clean. Be sure to change the bucket water frequently, so you aren’t spreading the same dirt and grime around. Toss your kitchen rugs in the washing machine if the label says it’s safe to do so; otherwise, follow the instructions for washing your outdoor rugs.

33. Spot clean cabinets

Cabinets can be cleaned with soap and water. But if they’re particularly greasy (usually around the stove, for instance), use a degreaser in addition to the cleaning solution, suggests Oliveira. Then wipe down the surface, and dry with a microfiber cloth.

34. Check expiration dates on pantry items

Check expiration dates, but don’t start tossing anything just yet. The “use by” and “sell by” dates generally don’t refer to safety (baby formula is an exception). Instead, these dates indicate how long food will retain peak quality, according to the U.S. Department of Agriculture. In many cases, you can stretch that out, but do prioritize those items in your pantry organization. Empty and clean the shelves and restock, placing the oldest food items in the front. Consider transferring packaged goods, such as cereals and pastas, to airtight storage containers to keep them fresh and organized.

35. Clean and descale your coffee maker

Remove any removable parts of your coffee maker — including the carafe, filter and water reservoir — and clean these with soap, warm water, and a sponge. “Next, make a solution of equal parts white vinegar and water, and pour into the water reservoir,” says Oliveira, who recommends descaling your coffee maker once every two weeks or at least once a month. To descale the inside of the machine, run the coffee maker through the brewing cycle until all of the solution has been used. Then empty the carafe and rinse with cold water. Fill the reservoir with cold water, and run a few more brewing cycles to flush out any remaining vinegar. Give the outside a good wipe to remove any grime, too.


spinner image hand wearing pink glove washing light blue tile with soap
Getty Images

BATHROOM

36. Scrub the tub and shower walls

Follow the cleaning guidelines for your tub based on material. Make a paste using water and baking soda or your favorite powdered cleaner, apply to all surfaces and allow the paste to sit for about 10 minutes. “Then scrub the tub with a scrub brush or sponge, paying special attention to any areas with stains or buildup,” says Samahria Richie, founder of Two Sisters Maid to Clean in Tennessee. (Always test in a small area, as abrasive cleaners, scrub pads and hard tools can scratch the surface of a tub.) Richie says that baking soda isn’t going to harm most tubs but will damage stone resin. Finally, rinse the tub with warm water, and dry it with a cloth to prevent water spots. Tackle the caulk and grout, too, which she says can be cleaned with a paste of baking soda and peroxide on a charcoal toothbrush. If your caulk hasn’t been replaced in five years or longer, is filled with mold and mildew, or is showing signs of wear and tear, it’s probably time for replacement.

37. Spruce up the showerhead

First, remove the showerhead from the wall. “Mix equal parts of CLR [a calcium, lime and rust remover] and water in a bowl, enough to cover the showerhead,” says Richie. Soak the showerhead in the solution for 10 to 15 minutes, then scrub any remaining buildup with an old toothbrush. Rinse the showerhead with water and reattach it. Finally, run hot water through the showerhead to clear out any remaining buildup. Because it’s a chemical, follow safety instructions on the CLR bottle and work in a well-ventilated area. Alternatives to CLR include Lime-A-Way and Simple Green.

38. Clean the drains

Drains can be cleaned with the remaining cleaning agent from your showerhead soak. “Simply pour the remaining solution down your tub or sink’s drain, followed by a rinse with hot water,” says Richie. If your drain smells bad, pour a pot of hot water down the drain, followed by a mixture of 1 cup baking soda and 1 cup vinegar. Insert the drain plug and wait 5 to 10 minutes. Then flush with another pot of hot water. For more stubborn blockages, a drain snake or plunger should do the trick. (Do not use boiling water, which can damage pipes, especially if they are older.)

39. Disinfect the walls around the toilet

You can’t see it, but there’s a good chance that your bathroom walls are coated in bacteria. “The walls around the toilet are constantly exposed to bacteria contamination from flushing the toilet,” says Cohoon, which is why it’s good practice to close the lid prior to flushing. Spray the walls with your disinfectant of choice and wipe with a paper towel that you’ll immediately dispose of to prevent cross-contamination.

40. Dispose of expired prescriptions

Expired prescriptions and over-the-counter medications lose their potency and must be discarded. The best disposal option is to take them to a drug drop-off location, which may be found in retail, hospital or clinic pharmacies or law enforcement facilities. Don’t just toss expired medications in the garbage, though. The FDA has a handy flush list you can follow — if your medication is not on the flush list, follow these instructions to properly discard them.

41. Throw out old makeup and cosmetic products

The shelf life of makeup and cosmetics varies by product, as each starts to degrade for different reasons. To add to the confusion, there are no U.S. laws or regulations that require cosmetics to have expiration dates. The shelf life for eye-area cosmetics (like mascara, eyeliner and eye shadow), for example, is two to four months. Stoller says a good rule of thumb is to go through all your cosmetics annually, though quarterly is better. “Get rid of what you don’t use, and evaluate anything that is over six months old,” she says.

42. Wash makeup brushes

Makeup brushes harbor bacteria, not to mention product residue, dirt and oil. The American Academy of Dermatology recommends washing them every 7 to 10 days. First, rinse the brush tips under lukewarm water. Then fill a bowl with lukewarm water and a tablespoon of gentle shampoo. Swirl the brush tips in the mixture (feel free to create a lather by massaging into the palm of your hands), rinse under running water, and repeat the process as many times as needed until the water runs clear. Squeeze out excess moisture with a clean paper towel, and let brushes dry flat on a towel.

43. Launder your shower curtain and bath mats

To clean your shower curtain, liner and bath mats, Richie suggests washing them together in the washing machine with mild detergent at least once a month. “The mats will help scrub buildup off your shower curtain,” she says. Refresh between washes by combining water and a few drops of essential oil in a spray bottle and misting the mixture onto the shower curtain and mats. Air-dry for a long-lasting and chemical-free fragrance.

44. Remove soap scum from the shower door

Use a dryer sheet to clean water spots and soap scum from glass shower doors. “Simply wet the dryer sheet and scrub the door, then rinse with water,” says Richie. The fabric softeners in the sheet help to loosen and remove the buildup, she explains, leaving your glass shower door sparkling clean. Plus, the sheet will leave a subtle scent behind.

45. Clean the toothbrush caddy

To remove residue and germ buildup, toss your toothbrush holder and soap dish in your dishwasher with your next load of dishes for a thorough cleaning. This should be done on a weekly basis.

46. Make rusty towel bars sparkle

A moist bathroom is the perfect breeding ground for rust. Spray rusty bathroom fixtures with white vinegar and let sit for 10 minutes. Then scrub with a sponge. For more stubborn spots, use a paste of baking soda, water and lemon juice. Another hack is to use wax paper to clean sink fixtures and provide a protective coating to prevent future stains.

47. Shine windows, mirrors and door knobs

For windows, mirrors, and glass surfaces, Richie says to reach for a microfiber cloth and glass cleaner. Door knobs can be cleaned with a damp cloth and disinfecting spray. Although there’s evidence that bacteria and germs — including E. coli and MRSA — can live on door handles,  you can clean these infrequently. Bathroom door knobs, however, should be cleaned every week. 

48. Scrub the toilet bowl

Richie says to clean your toilet bowl by wearing rubber gloves and using toilet bowl cleaner with a brush. Then use a sponge or cloth and warm water to clean the rest of the toilet. “For stubborn stains, use a wet pumice stone by soaking it in water and gently rubbing it on the stains,” she says, noting that you should avoid scrubbing too hard to prevent scratching the porcelain. Rinse the toilet bowl and flush to remove debris from the pumice stone.

49. Strip your towels

Hung in a humid bathroom, bath towels can harbor bacteria, so it’s best to use a freshly clean towel every other day. Laundry stripping — which removes residue from detergents, fabric softeners, hard water minerals, oil, dirt and bacteria — is a legit way to get your towels and bedding really clean. To strip your towels — a practice that went viral on TikTok — fill your tub or large container with hot water. Add ¼ cup Borax, ¼ cup washing soda (sodium carbonate) and ½ cup detergent, stirring until it’s dissolved. Submerge your towels and soak for hours, until the water has cooled, making sure to stir the towels occasionally. Run your towels through a rinse-only cycle and tumble dry.


spinner image vacuum on gray carpet
Getty Images

LIVING ROOM

50. Purify the air

An air purifier with a HEPA filter can remove up to 99.97 percent of particles and allergens from the air, says John McKeon, M.D., CEO and founder of Allergy Standards Limited (ASL). When shopping for a unit, look for one that has a clean air delivery rate (CADR) commensurate with the Environmental Protection Agency’s suggestions based on room square footage. The organization also warns that products featuring bipolar ionization may generate potentially harmful by-products.

51. Wipe down light switches and electrical outlet covers

Outlet covers and light switches get dingy and grimy, says Taylor. He recommends putting a little bit of all-purpose or glass cleaner on a clean cloth and wiping them down instead of spraying them directly, and avoiding direct contact with the electrical components. For stubborn stains, try a dry toothbrush to loosen the debris without scratching the plastic.

52. Wipe down electronics

To safely clean electronics, Richie says to unplug them and use compressed air and a soft-bristled brush. “Hold the can upright, spray short bursts into crevices and sweep away dust with the brush,” she says. “For delicate screens, avoid compressed air and use an alcohol-based hand sanitizer gel on a cloth to gently wipe away fingerprints and smudges.” Turn off each device and unplug it from its power source, then wipe down with a dry microfiber cloth to remove dust. For safe disinfection, Katie Dills, senior vice president at The Cleaning Authority, suggests a 1:1 solution of water to rubbing alcohol sprayed onto a microfiber cloth (never spray the solution directly onto a device). Then wipe away any excess moisture with a dry cloth. Alternatively, for things like earbuds, keys and cell phones, look into a UV light sanitizer known to kill up to 99.9 percent of bacteria and viruses, like the Philips UV Light Sanitizer Box, Phonesoap 3 or Homedics UV Clean Sanitizer Bag.

53. Clean your computer keyboard

“You may be surprised by how much dust, crumbs, bacteria and more live in your keyboard,” says Nelson, who recommends cleaning your computer keyboard with an air duster, followed by antibacterial wipes. Use a microfiber cloth to gently clean your computer screen to remove any smudges, but don’t use eyeglass cleaner to clean your computer screen, as the chemicals could damage the surface.

54. Wash throws and blankets

Throws and blankets should be washed once a month, using a mild detergent and cold-water setting. Richie’s trick for remembering this task is to pick a specific day of the month, such as the first Saturday or last Sunday, to do it.

55. Tidy up bookshelves

Clean bookshelves with a duster that attracts and traps dirt and dust — like Swiffer, EnviroCare or reusable Millifiber — without removing books and other items. Swipe each book and work down the shelf, cleaning spines and decor, says Richie. Extend the duster handle to reach top shelves. Finish by wiping down remaining debris with a dry cloth.

56. Refresh carpet

Before vacuuming, use your shoes to run a few dryer sheets over the carpet. “The dryer sheet's anti-static properties attract dust, dirt and hair to the surface, making it easier for the vacuum cleaner to pick them up,” says Richie. Move lighter furniture out of the way, and slip sliders under the bigger pieces so you can more easily maneuver them. After vacuuming the carpet, use a steam cleaner with cleaning solution. (You can rent a steam cleaner from big-box stores, but some sell for well under $200 and can clean more than just carpet, so buying one might be worth the investment.) To soften the fibers of your carpet and leave a clean scent, she suggests adding some of your favorite fabric softener to the solution (but do a spot test first to ensure it does not discolor or stain your carpet).

57. Deodorize carpets in high-traffic areas

Start by thoroughly vacuuming, making multiple passes over each area (and emptying the canister or replacing the bag as needed). Next, Taylor says to use the vacuum hose attachment and edging tool to go around the perimeter of the area to pick up everything that got pushed to the sides — if you can still see hair, fur or debris in the corners next to the wall or baseboard, use a small whisk broom and then suck debris up with the vacuum hose attachment. Sprinkle the area with baking soda, let sit for 15-20 minutes and then vacuum one last time.

58. Dust furniture and wall art

Clean upholstery with vacuum cleaner attachments. First, use the crevice tool to clean around the edges and corners of the upholstery, then attach the upholstery tool and vacuum the surface of the furniture. Richie says to consider using a brush attachment for deeper cleaning and a rubber brush attachment or glove to remove pet hair. For tough stains, try a spot cleaner made for upholstery (but first test it on an inconspicuous area). Finish by misting with fabric refresher, and then wipe down wood and hard surfaces with a microfiber cloth and mild cleaning solution. Run a damp microfiber cloth over picture frame edges, and use a glass cleaner on the faces if covered by glass.

59. Spruce up curtains and throw pillows

Curtains and throw pillows should be washed every three months in cold water with a mild detergent, says Richie. Allow curtains to dry on a low-heat setting in the dryer, and hang them up slightly damp. “Allow them to dry completely after misting with wrinkle-release spray,” she says. Once dry, mist curtains with a fabric refresher to give them a long-lasting scent. If possible, throw pillows should be laid flat to dry in the sun; otherwise, place them in the dryer on a fluff-dry cycle to maintain their shape.

60. Fireplace

Examine the exterior of the chimney for any signs of damage. “If you notice a lot of smoke or the smell of gas in your home when you use your fireplace, these are two obvious signs that there may be damage to your fireplace,” says Sinclair, who notes that cracks, rusting or stains may also be signs that your fireplace has some damage. Have the flue inspected by a certified chimney sweep yearly and if you use it often have it cleaned once or twice a year. 


spinner image bedsheets crumbled up on top of bed; two pillows without pillowcases on bed
Getty Images

BEDROOMS

61. Dust fan blades

There are two ways to clean fan blades, explains Koch. The first is to take a pillowcase, place it over each blade and pull it off, dragging dust off into the pillowcase as you go. You can spray some water or dusting spray on the inside of the pillowcase, too, if you'd like. This method traps all the dust inside the pillowcase so it doesn't fall below. You can then shake it out outside or over the trash and toss it in the wash. But if you can't reach the blades, use an extendable duster that bends so you can curve it over the blade and clean the top, then the bottom. Do this first, then clean everything below it. And now that it’s spring, switch your fan from clockwise to counterclockwise (this will create a cool downdraft).

62. Freshen your bed

Mattresses should be cleaned about every six months, the Sleep Foundation recommends; dust mites, dead skin and dirt accumulate, even if you can’t see them. First, check the instructions on your mattress cover before removing it. If the label says “Do not remove the cover,” your mattress may contain fiberglass, which is used as a replacement for harmful chemical flame retardants. Consider buying a mattress protector to put over both the mattress and the cover to help keep your mattress clean.

Sprinkle baking soda all over your bare mattress, and let sit for an hour before vacuuming it up with a hose attachment. “For some added scent, I like to take dried lavender and grind it in a food processor with the baking soda and sprinkle that mixture all over,” says Koch, who suggests cleaning the mattress this way every three to six months. To remove stains from the mattress, spray some peroxide on them and let sit until dry. The stains should fade without any need for scrubbing. For an extra-deep clean, use a steam cleaner — be sure to hold the steamer a few inches above the mattress surface. Open the windows, turn on fans and allow the mattress to air-dry completely. This can take several hours or more.

63. Get under the bed

The same dust mites, dead skin, and dirt that accumulate on your mattress hide under your bed. Cohoon says this accumulation creates the ideal breeding ground for bacteria, and it also creates poor air quality. First, remove all items from under the bed and then sweep out all the debris. If it’s carpeted and you can fit a vacuum (or robot vacuum) under there, do so. If there’s hard flooring, do your best to clean the floors with a mop and solution mixed into warm water — not hot, as it can damage wood flooring.

64. Wash all bedding, including shams and dust ruffles

Remove sheets, shams, pillowcases and bedding. Shams and dust ruffles can often be placed in a delicates bag and washed on the delicate cycle. Koch says to wash standard bedding (sheets and pillowcases) once a week; duvet covers once a month; shams, dust ruffles and duvets every six months. You can also laundry strip these textiles, following the instructions in the “Strip your towels” section. For children’s bedding, Koch says to use a gentle, fragrance-free detergent. “There can be harsh ingredients or ones that cause skin sensitivities in many popular detergents or fabric softeners and dryer sheets, so I always recommend everyone avoid those and reach for something more natural and gentler, especially for kids’ clothing and bedding and anything that would be against their skin long-term." For pet bedding, vacuum every week and wash twice a month. “If the bed is too large for your washing machine, take it to the laundromat,” Koch adds. “To dry, simply place it in the dryer on the hottest setting or set it outside in direct sunlight. Some stuffing can clump when dried in the dryer, so air-drying may be the better choice.” 

65. Clean out your closet

Once or twice a year, take items off the shelves and dust or wipe them down. “You'd be surprised how dirty these get, especially where shoes are stored,” says Koch. Don't forget the hanger bars, which also get dusty — take the hangers off and run a cloth along them. Look through purses you don’t use often, and discard any old chewing gum, candy, tissues or makeup. Remove anything else you find inside, like old wallets, loose change, sunglasses or pens.


spinner image clothes in washer with water pouring down
Getty Images

LAUNDRY ROOM

66. Wash the washing machines

Get rid of any leftover dirt and lint to ensure your appliances are working effectively in a shorter amount of time. Wipe the inside and outside of your washing machine with a solution of hot water and vinegar, Dills says. Then run a full cycle, adding 4 cups white vinegar with ½ cup baking soda.

67. Defuzz the dryer

Clear the lint traps after every load, but for a deep clean, unplug the appliance from the wall. Then remove the lint screen that lies within the trap of the dryer. Lance Sinclair, president of One Hour Heating & Air Conditioning, Benjamin Franklin Plumbing and Mister Sparky, recommends using a vacuum crevice tool to grab any excess dirt or other materials from the lint screen. He says this built-up lint increases the probability of starting a fire, not to mention costing you more due to wasted energy. You can purchase a kit that attaches to a drill to clear lint traps yourself, or hire a professional once a year to clean the dryer vents. Look for spring specials and promotions.

68. Make your towels more plush

Taylor says you can make your towels hotel-luxe again by washing them in hot water with laundry detergent and either one cup of white vinegar or half a cup of baking soda. If your towels are particularly rough or lacking in bounce, soak them in hot water and baking soda or vinegar for a couple hours before washing.

69. Pay attention to the utility sink

Rinse the sink thoroughly, and use a sponge and your favorite powder cleanser to scrub the surface. Then pour vinegar over the sink, and let it sit for a few minutes before rinsing thoroughly with warm water. To help prevent plumbing and drainage problems, Sinclair says to place a lint trap at the end of the washing machine hose to stop debris before it gets to the sink's drain. For an extra layer of protection, place a lint or hair catcher on the drain.

70. Pour water down your floor sewer drain

If you have floor drains in your home and smell a foul odor coming from them, it’s because the traps have dried out. At least twice a year, dump 1 or 2 gallons or preferably a whole 5-gallon bucket of water into the drain. This will not only seal off sewer gasses, it will also let you see if the drain is working properly.


spinner image hand holding smoke detector on ceiling; another hand holding battery beneath it
Alamy

WHILE YOU’RE AT IT

71. Check for cracks in the foundation

Look at the walls and foundation of your home for signs of water damage or cracks. Inside, look for warped floors or ceilings, specifically signs of buckling, bulging or sloping. Also examine your walls for cracks, leaning or bowing, and inspect support beams for cracks too. If you have a chimney, a tilt to the structure or cracks are a sign of foundational damage.

72. Change out HVAC air filters

Most air filters are designed to last one to three months (check the packaging), but they may clog up faster depending on the amount of dirt, contaminants and pets in your home. Sinclair says that during the hottest or coldest months of the year, you may want to replace these filters more often to help improve air quality and make the system run more efficiently. 

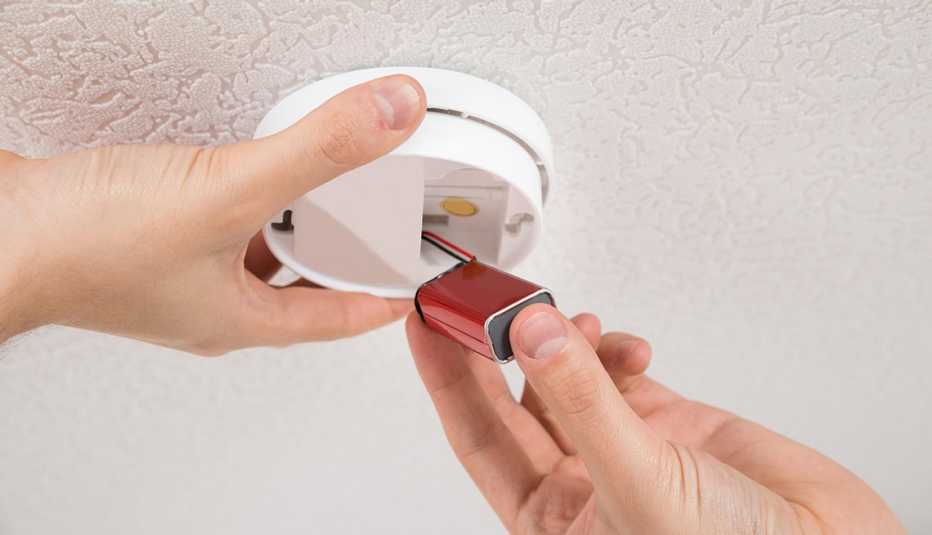
73. Replace batteries in smoke alarms

Even if your alarms aren’t giving you a warning beep yet, Sinclair advises changing the batteries once a year — and replacing the smoke detector itself once every decade. But don’t forget to check your detectors once a month, by pressing the test button. If any don’t respond, replace the batteries (and always keep an extra set or two on hand so you’re never without).

74. Clean or replace your vacuum’s filter or bag

If your bagless or canister vacuum has a foam filter, remove it. Submerge the filter in water, squeeze it out a few times until all the dirt is gone, and let it air-dry. Disposable vacuum bags for upright vacuums should be replaced when full. If the bag is reusable, empty it into the trash and tap out any lingering debris. If your vacuum has a round, pleated cartridge filter, remove it and tap against a garbage can to loosen debris, then let all the sediment fall away. Finally, HEPA filters need to be replaced every two to three years.

75. Sump pump

If you have one in your basement, test it to be sure it’s clean and operable and that the outflow is draining properly. It’s important to do this during the wettest weeks, whether due to rain or melting snow, as catching a problem early is crucial. Sinclair says the simplest way to do this is to slowly pour a bucket of water into the sump pit; if the pump starts up automatically, you're in good shape. Over time, the sump pump's filter screen will collect mud, leaves, pebbles and other debris that can lead to clogs, premature shutoff of the pump or standing water in your basement. He says to wipe the filter clean, unplug the sump pump and carry it outside, along with the drain. Disconnect the drain line and use a hose to flush out any debris or clogs, then flush the entire unit with water. Before putting the pump back in place, thoroughly clean the entire sump pit, taking care to remove anything that could clog the drain line. Then, with the pump reconnected, take an extra moment to pour a bucket of water into the pit and verify that the system is working.

76. Get to know your home’s main energy supplies

Know where and how to shut off valves for gas, oil, water and your home’s main electrical supply. Put tags on these valves so you can find them quickly in the event of a disaster or emergency. But have a professional turn them back on again, the Federal Emergency Management Agency warns. Within your electrical panel, breakers can become worn over time, so be sure to call a licensed electrician to perform an inspection as preventive maintenance. Panels with fuses are outdated and should be replaced by a professional.

Unlock Access to AARP Members Edition

Join AARP to Continue

Already a Member?